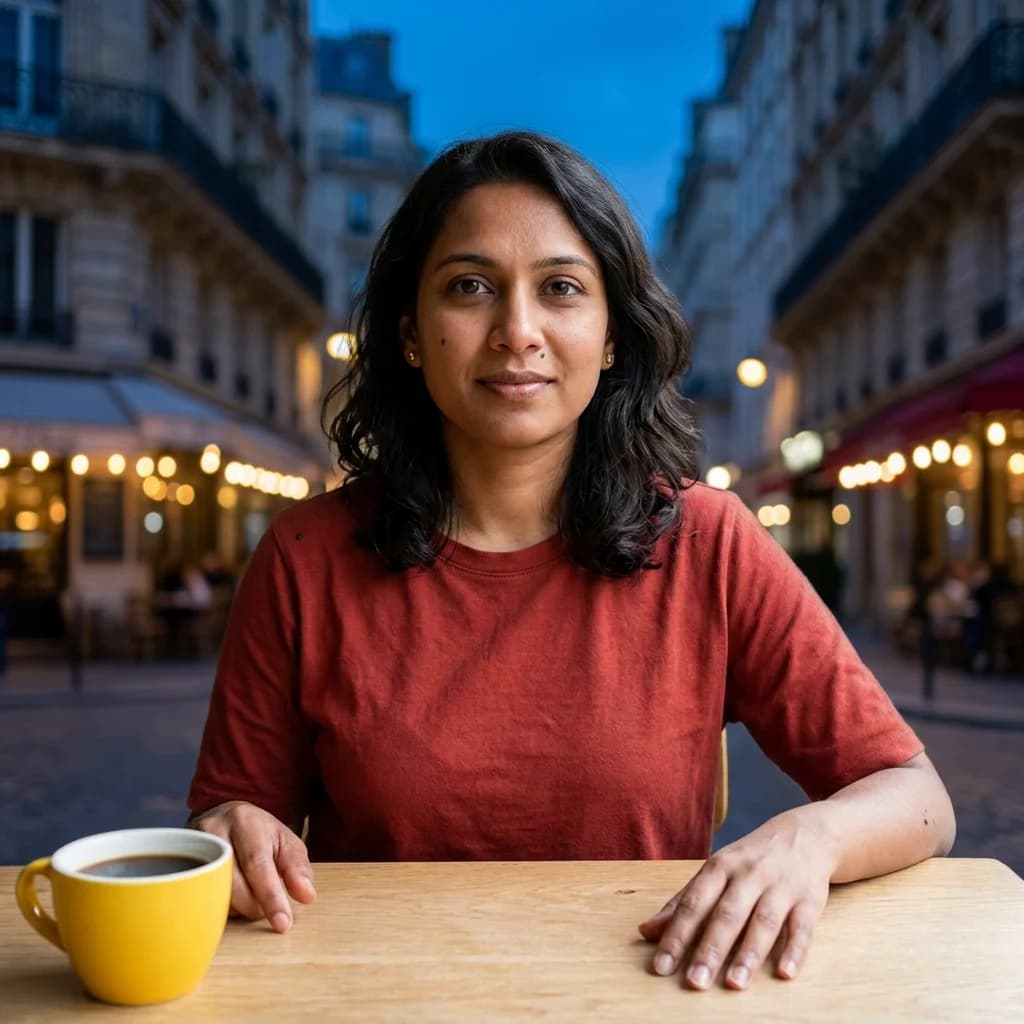
A useful AI photo editing prompt tells the model two things: what to change and what to leave alone. "Make this photo better" leaves both decisions open. "Replace the wall with a blurred street cafe; keep the face, clothing, hands and crop" gives you something specific to judge.
This is a practical editing guide, not another collection of unrelated portrait styles. Start with a photo you have permission to use, choose one edit, and compare the result against your source. We use one fictional portrait for three identical-prompt comparisons between Nano Banana 2 and Nano Banana Pro. The method applies more broadly, but these examples do not test every image model.
For a model-specific library with multi-image inputs, product examples and sequential edits, open our Gemini photo editing and Nano Banana prompts guide. For scenes created mostly from scratch, use the AI photoshoot prompts collection instead.
Choose the task before writing the prompt
| Your problem | Ask for | Protect from change |
|---|---|---|
| A distracting location | A background replacement | Face, pose, foreground edges |
| Flat or mismatched light | A lighting adjustment | Skin tone, facial detail, geometry |
| An unwanted object | A small removal | Nearby hands, surfaces and shadows |
| The wrong outfit | A clothing replacement | Body proportions, hands and identity |
| A face that drifts between edits | An identity-preservation pass | Distinctive features and original reference |
The reusable photo-editing prompt formula
Use reference + change + keep + integration + output:
Edit the uploaded [photo]. Change only [specific object, region or property]. Keep [identity, geometry and important details] unchanged. Match [light, perspective, material or shadow] to the existing scene. Keep [crop/aspect ratio]; do not add [specific unwanted change].
You do not need camera terminology for every edit. A mug removal needs a clear location and an instruction to rebuild the table, not a different lens. A background replacement needs perspective and light integration. An outfit change needs garment shape, fabric and boundaries.
Weak: "Make this look professional."
More useful: "Replace the patterned wall with a plain warm-gray backdrop. Keep my face, hair, expression, shirt, shoulders and crop unchanged. Retain the original soft light and natural skin texture."
If your editor provides a mask or selection, select the smallest region that includes the edit and its shadow. Text-only editing can redraw more than the region you name. A keep instruction reduces ambiguity; it is not a pixel lock.
Our same-photo comparison setup
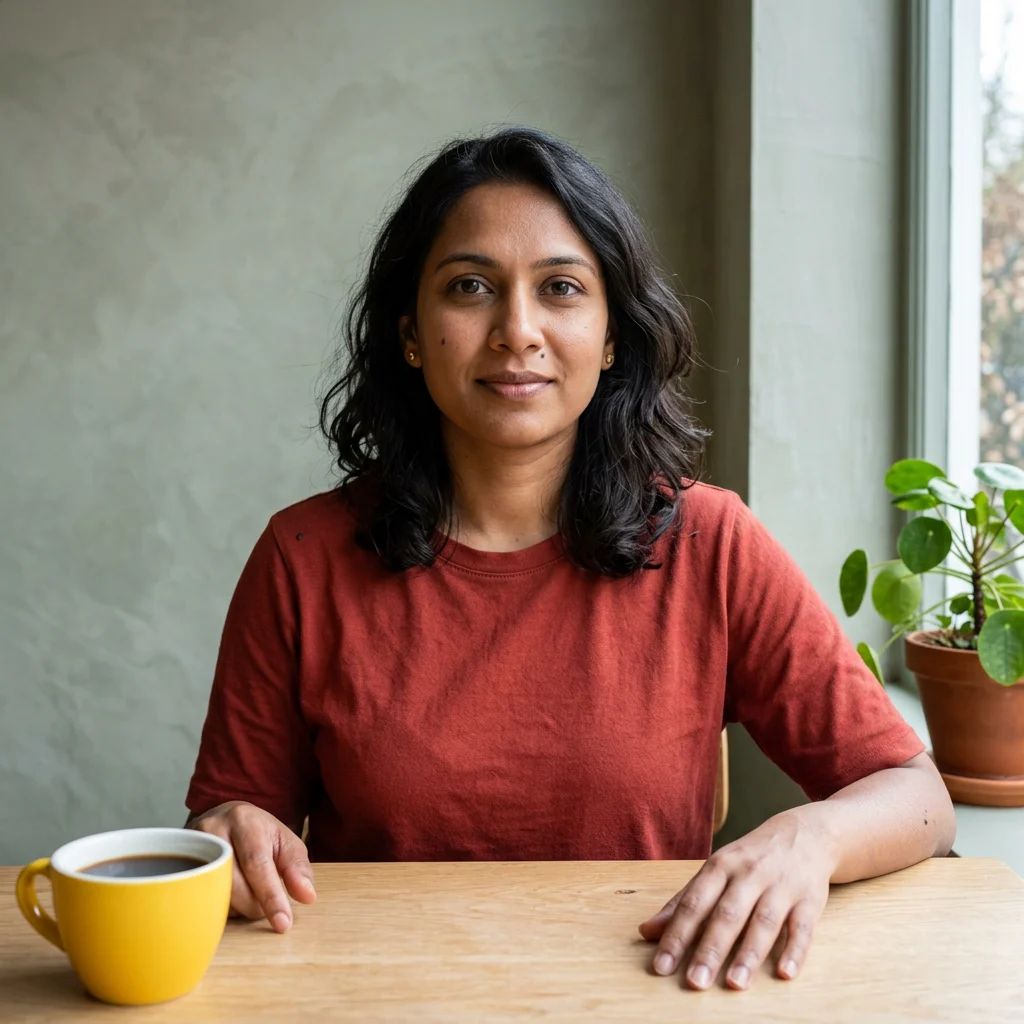
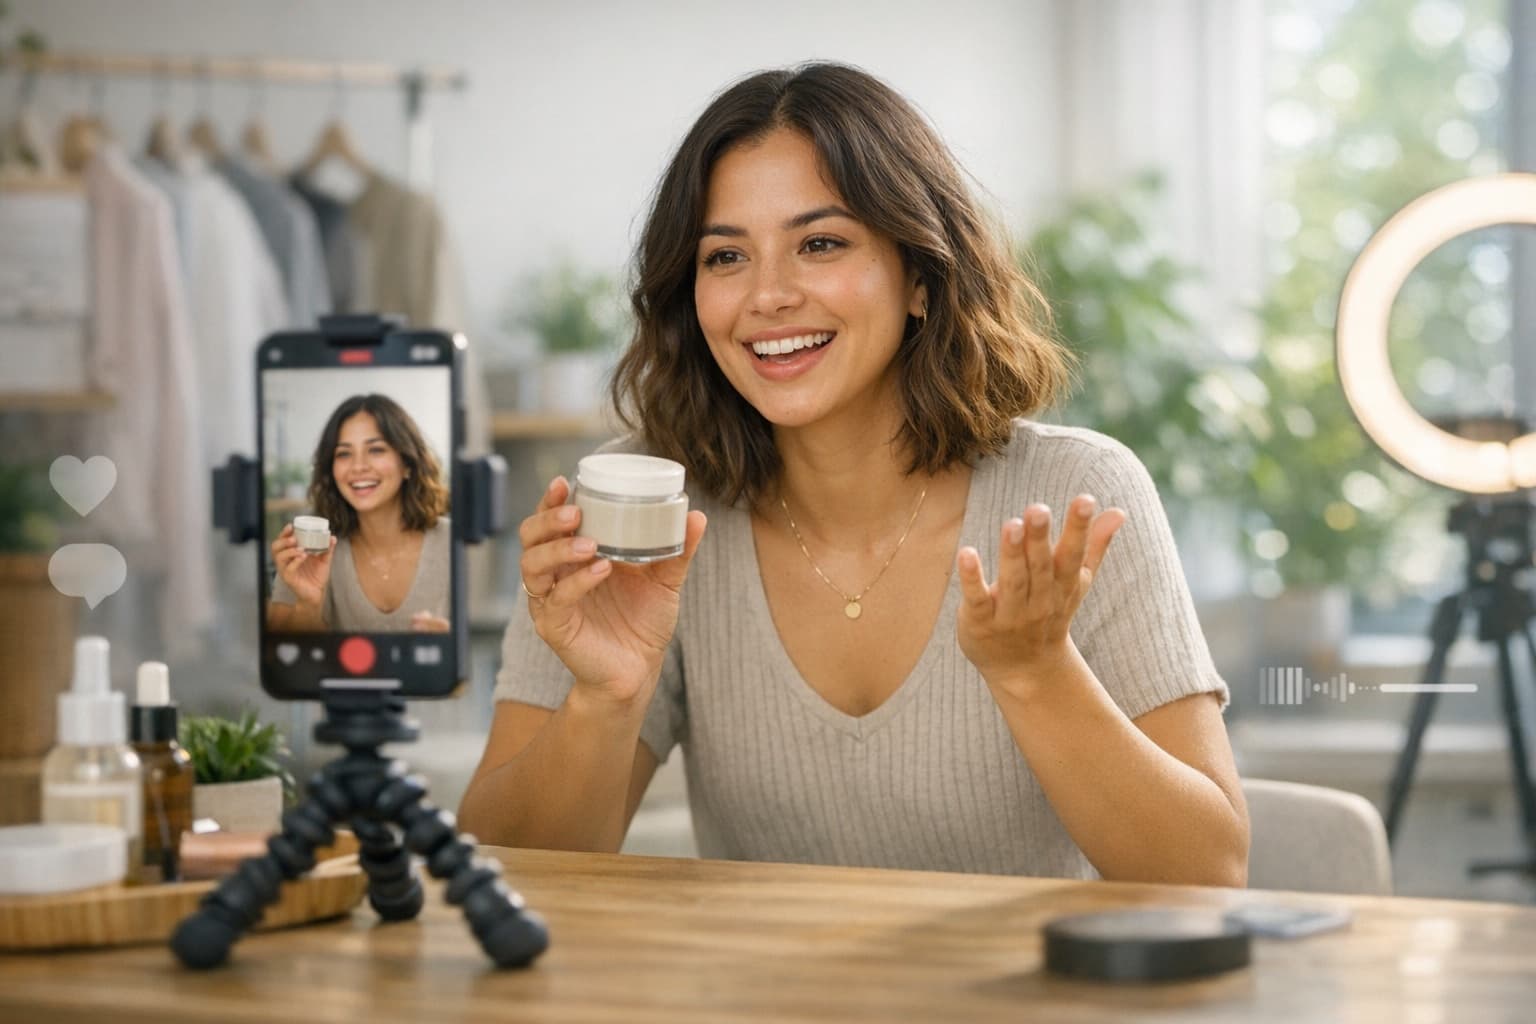
How we made these examples: On September 19, 2026, we generated this source with Nano Banana 2 through fal.ai. Each of the six comparison edits below received the same source and the exact prompt shown. We requested one square 1K PNG per edit, with no mask, no fixed seed and no rerolls. The endpoints were fal-ai/nano-banana-2/edit and fal-ai/nano-banana-pro/edit. Website copies are compressed WebP images.
These are single examples from two related Gemini-family models, not a benchmark or a promise of identity preservation. Provider versions can change. We did not measure generation speed or publish a universal winner. Inspect each pair for the requested change and unintended changes.
1. Change the background without recasting the person
Separate the background from the foreground explicitly. Name the wall, window and plant to replace; name the hands, table and mug to keep. Otherwise a request for a new cafe may redraw the entire scene.
Edit the uploaded photograph. Replace only the sage wall, window and plant behind the woman with a softly defocused Paris street cafe at blue hour, warm round lights in the distance. Keep the woman's exact face, age, skin tone, hair, rust-red top, pose, both hands, yellow mug, wooden table and square crop unchanged. Match the background perspective to the eye-level camera. Keep her existing soft face lighting; do not add signs or text.
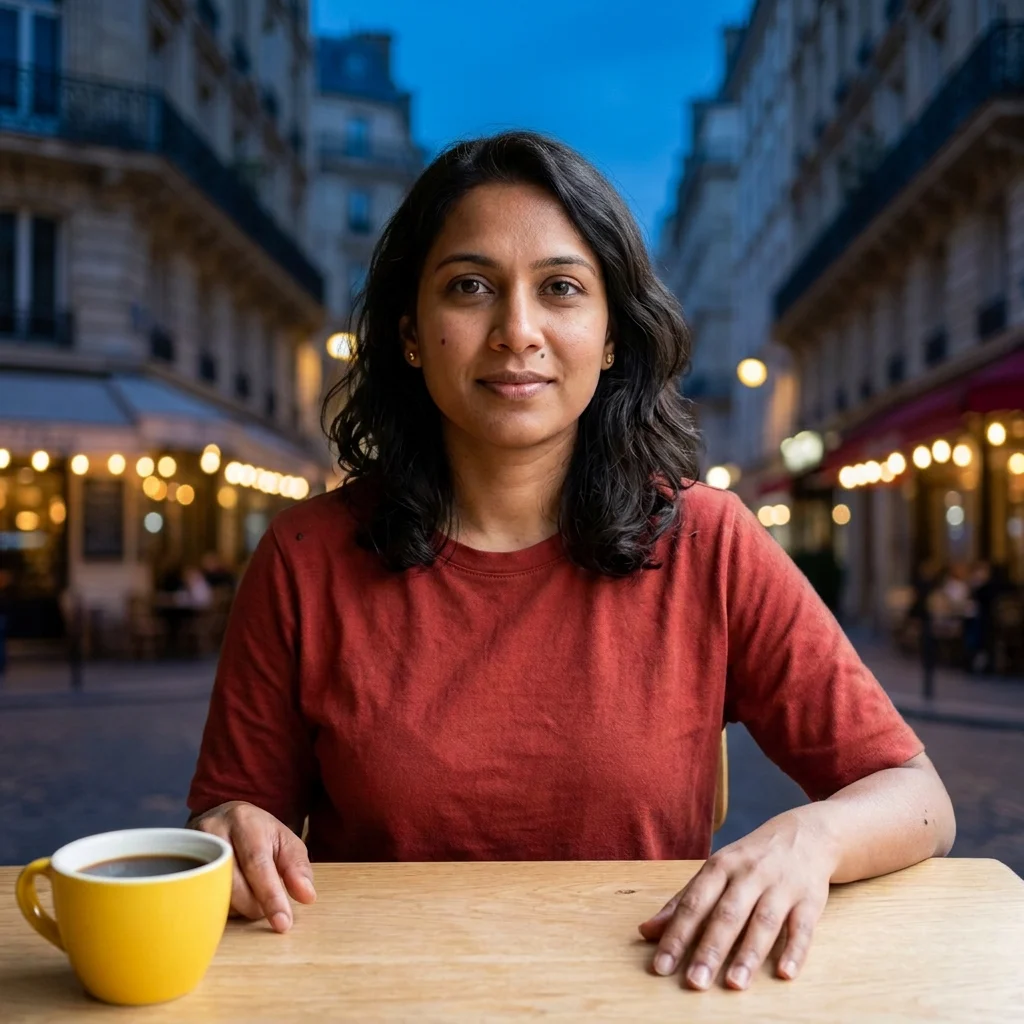
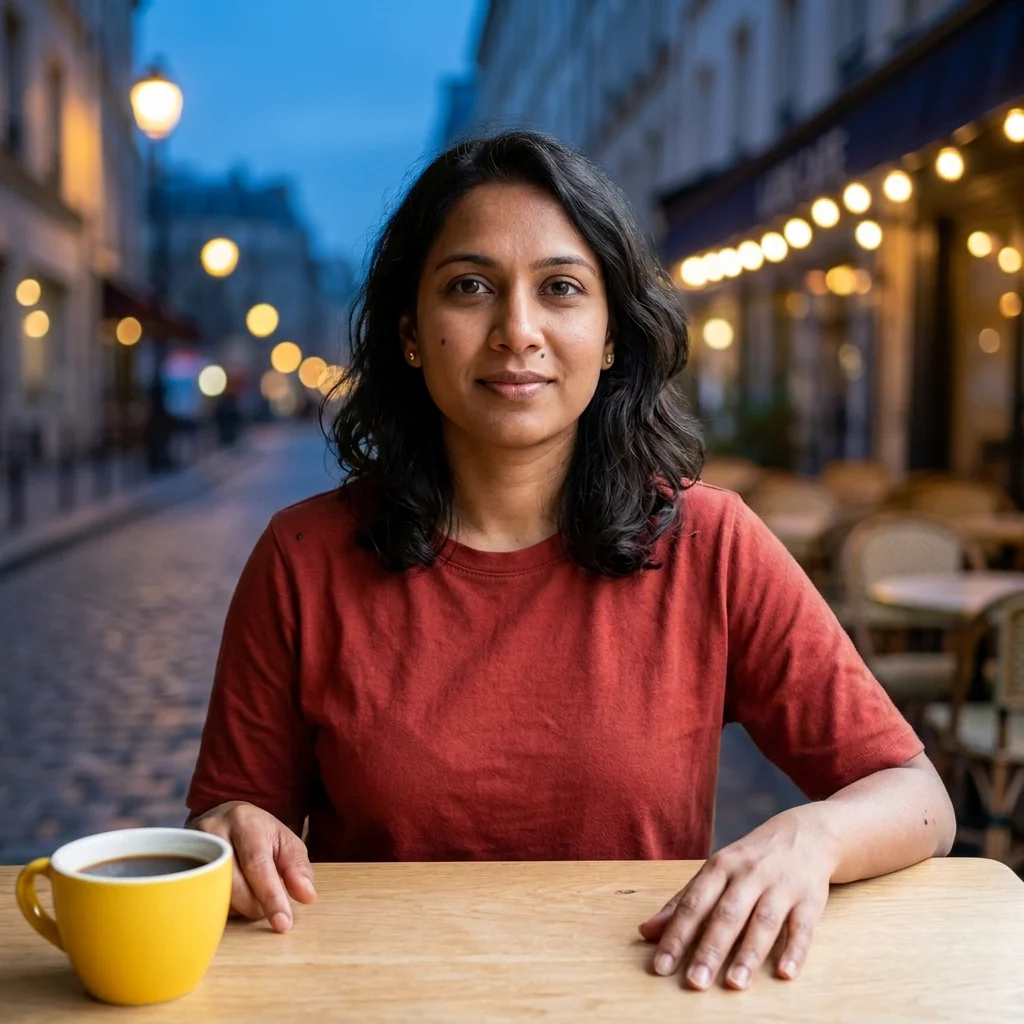
What happened here: Both outputs replaced the indoor background and retained the yellow mug and rust-red shirt. Pro produced larger, softer background lights; Nano Banana 2 left more street structure visible. That is a difference in interpreting the blur instruction, not evidence of an overall winner.
Check the boundaries: Compare hair strands against the street lights, the table edge and the outline of both shoulders. Does the person still sit at the same angle? Is the mug still present? A beautiful new location is not a successful edit if the face or pose has changed unnecessarily.
An intentional tradeoff: This prompt asks the model to keep the original face lighting. That helps isolate the background change, but a daylight-lit subject may not fully belong in a blue-hour scene. Approve the background first, then make a separate lighting pass. The Gemini guide's two-step example demonstrates that next step.
For a simpler cutout rather than a new scene, use a background-removal workflow instead. Generating a street and making a transparent cutout are different tasks.
2. Fix the lighting without repainting the face
Describe where the light comes from and how strong the change should be. "Cinematic lighting" can mean anything from soft daylight to a dark neon scene. "Warm light from the existing right-hand window" anchors the change to the photo.
Edit only the lighting and color of the uploaded photograph. Make the existing window on the right cast warm late-afternoon sunlight, with a soft amber highlight along the right side of the hair and gentle fill on the shadow side of the face. Preserve realistic brown skin without orange saturation. Keep the exact face, age, hairstyle, expression, rust-red top, hands, yellow mug, plant, wall, table and square composition unchanged. No skin smoothing or new objects.
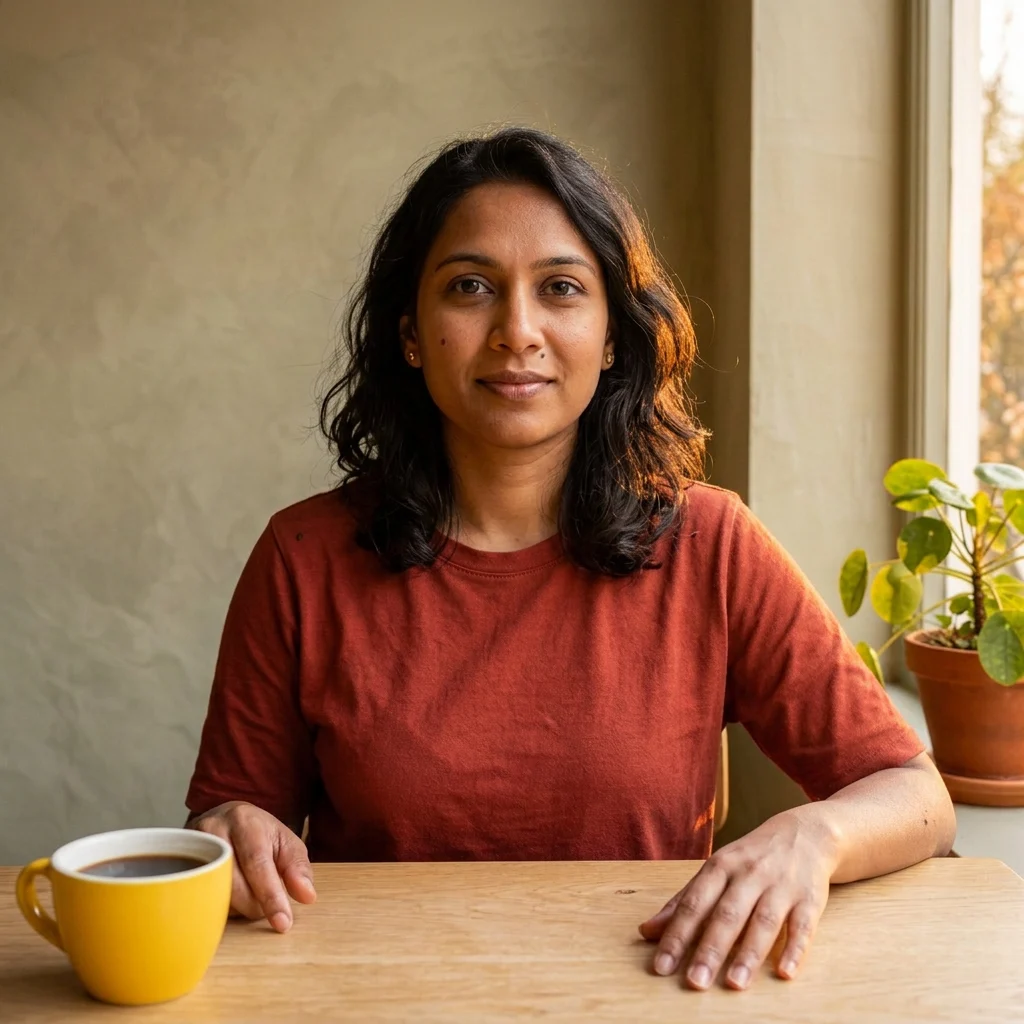
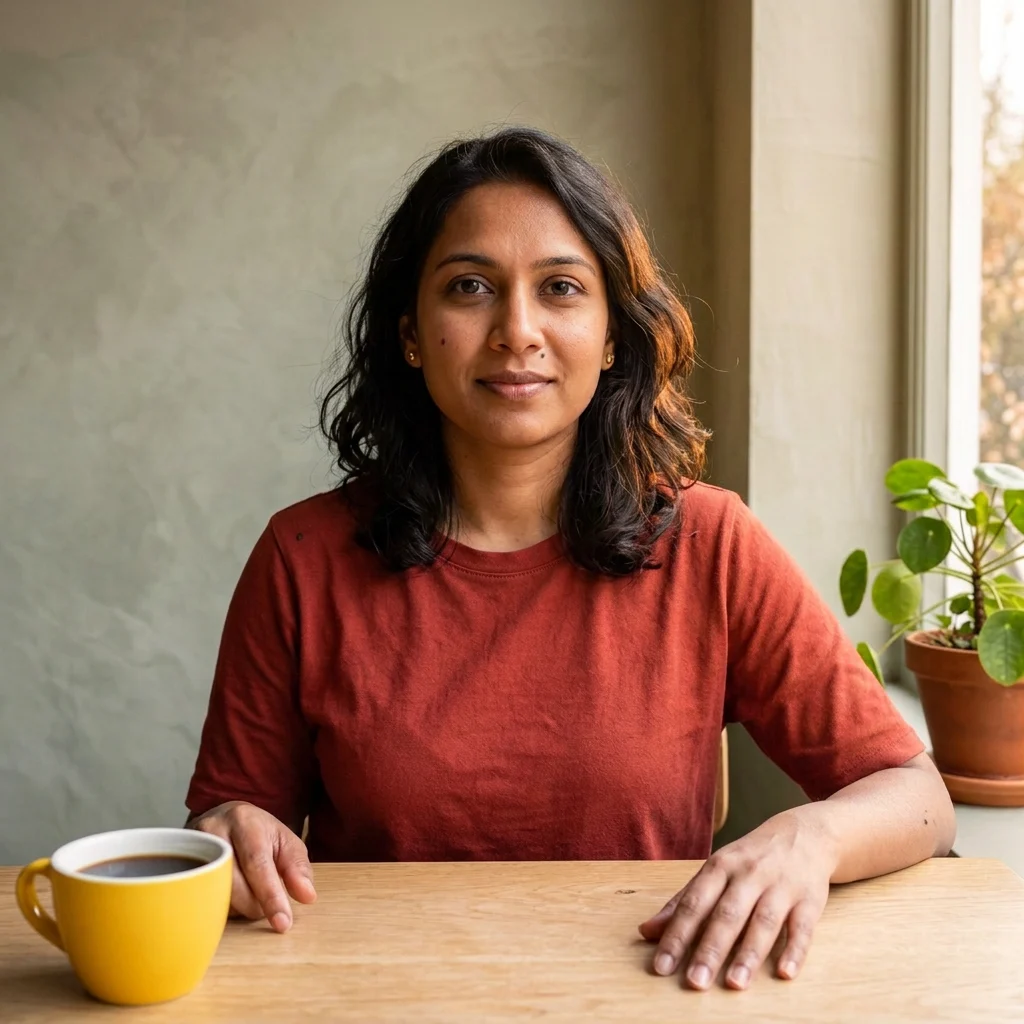
What happened here: Nano Banana 2 warmed much of the wall and tabletop as well as the portrait. Pro kept more of the original sage wall color, with a more restrained warm highlight in the hair. Decide whether you wanted a scene-wide golden treatment or a smaller lighting adjustment before choosing an output.
Check color separately from brightness: Compare forehead and cheek color, the white of the eyes, the yellow mug and the pale table. A result can look warmer while also becoming too orange. Check whether shadow detail survives and whether the model quietly smooths the skin.
If the result is too strong: Start again from the original and reduce the request to "slightly warmer white balance and gentle fill on the shadowed cheek." Do not keep editing an overprocessed result if the source has better texture.
For a small exposure or white-balance correction, a conventional photo editor may be the more predictable choice. Generative relighting is useful when you want a new light direction or visual treatment, but it can invent details.
3. Remove a distraction, not half the scene
Point to a specific object using its color and location. Include its cast shadow if that shadow should disappear. Tell the model what belongs underneath: oak grain, plaster, grass or the continuation of a patterned surface.
Edit the uploaded photo. Remove only the yellow mug and its handle, liquid and shadow from the left side of the wooden table. Reconstruct uninterrupted pale oak grain in that small area. Preserve both hands, the woman's face, skin texture, clothing, pose, wall, window, plant, existing lighting and exact square crop. Do not change anything else.
Check the repair, not just the disappearance. Follow the grain through the filled area. Check the fingers closest to the object. Look for a repeated patch, an unexplained dark shadow or a missing piece of the table edge.
See the tested Nano Banana removal example for this exact source. For selection-based cleanup, the magic eraser guide explains the more focused workflow.
An AI fill invents what was hidden. Do not treat the reconstructed surface as evidence of what was actually behind an object, and do not use this method to remove ownership marks from someone else's work.
4. Change clothing without changing the body
Specify the replacement garments and the physical details that matter: neckline, sleeves, fabric and layering. Keep body proportions, seated pose and hand positions explicit. Avoid adding a new location or pose to the same request.
Edit the uploaded photograph by replacing only the rust-red cotton top with a dark navy tailored linen blazer over a plain ivory crewneck shirt. Keep the same person's face, age, skin tone, hair, expression, body proportions, seated pose and hand positions. Keep the original wall, window, plant, yellow mug, wooden table, daylight and square crop unchanged. Natural linen texture and sleeve folds, no jewelry changes, logos or beauty retouching.
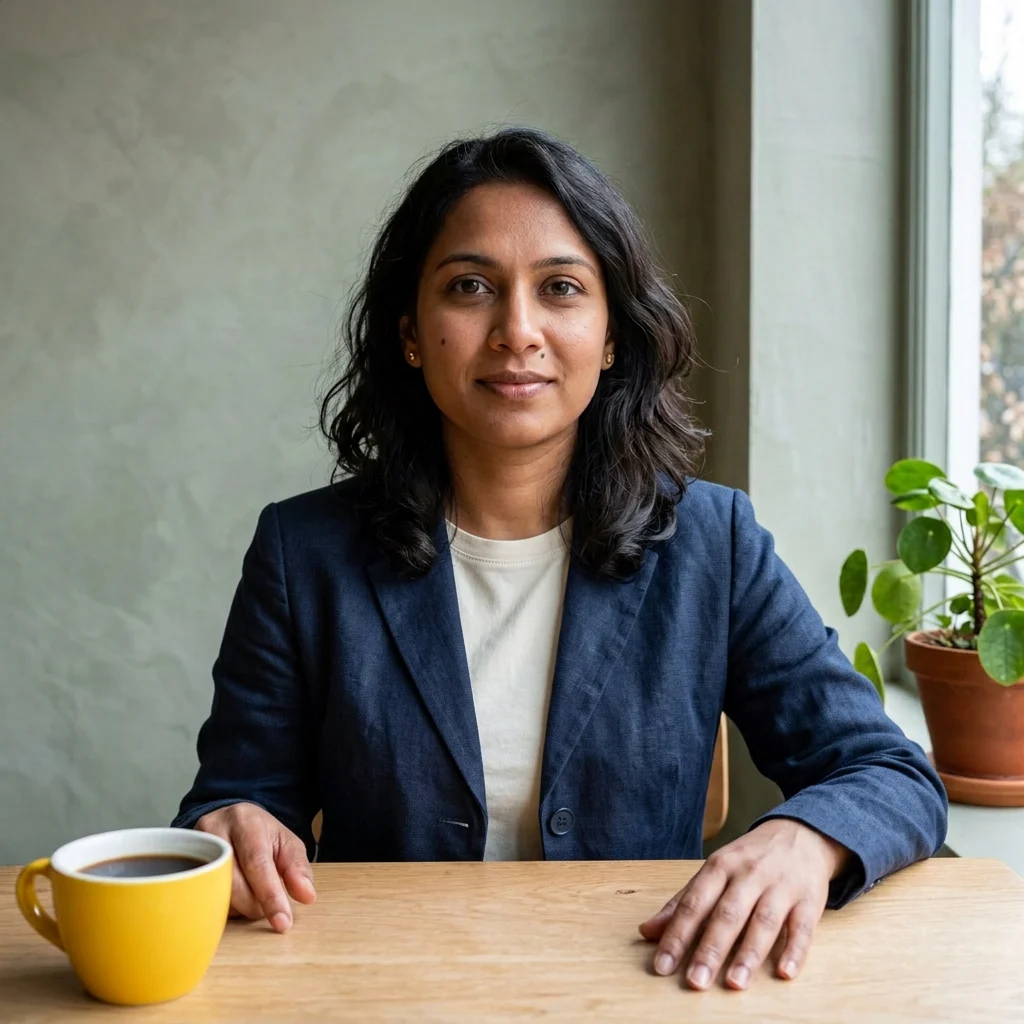
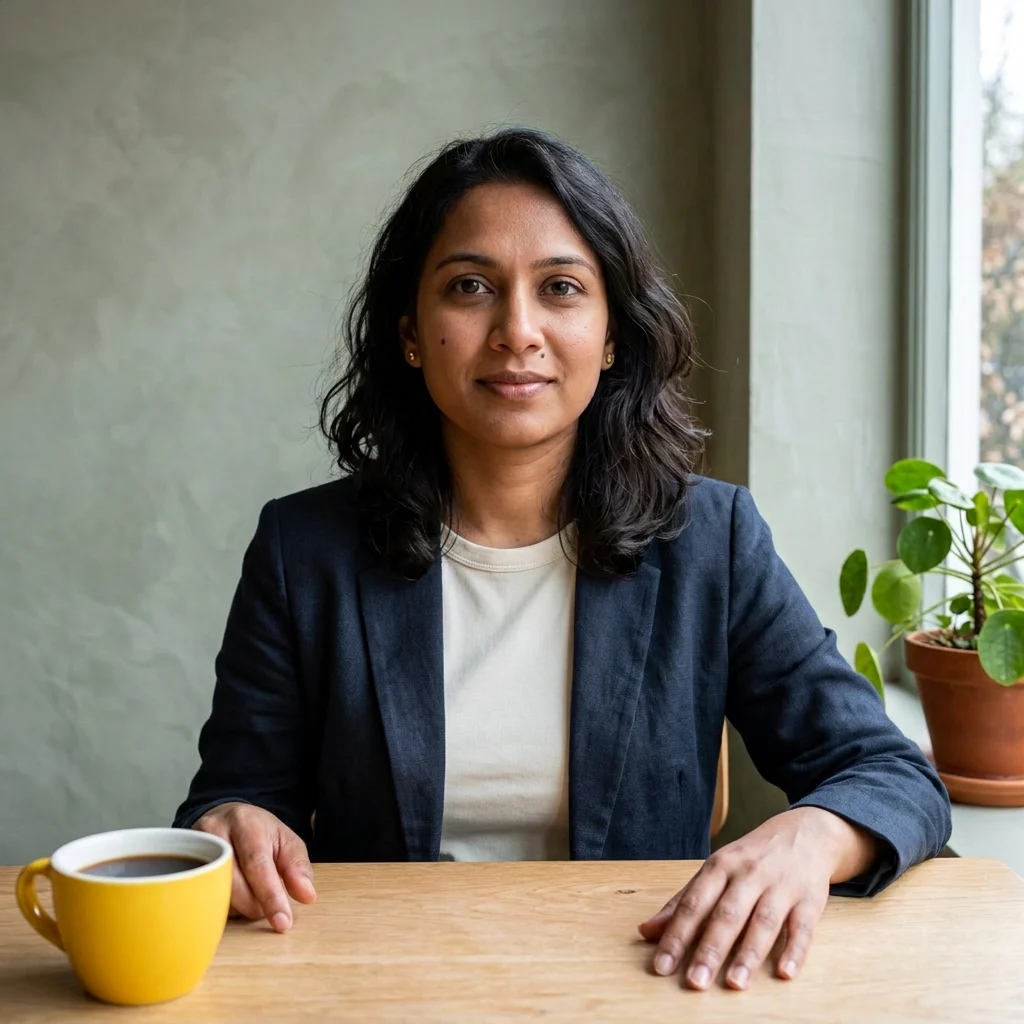
What happened here: Both outputs produced a navy blazer over an ivory shirt, but the lapels, open front and sleeve folds differ. Neither is a reproduction of a specific real jacket because we supplied no garment reference.
Check fit and contact: Look where cuffs meet wrists, where the blazer crosses the torso and where forearms meet the table. Does the new fabric follow the existing seated pose, or did the model reshape the body to fit the jacket?
When to split the edit: If both the outfit and face drift, simplify to a color change first. If a specific garment must be reproduced, upload a second reference and identify which image supplies the person and which supplies the clothing. A text description alone cannot encode every seam or cut.
Use outfit changes for consensual styling and creative previews, not as proof of how a real garment fits. An AI image does not measure size or fabric behavior.
5. Preserve identity by limiting the edit
"Keep the same face" helps communicate your intent, but it cannot guarantee the same identity. Every additional request creates another opportunity for changes to the eyes, nose, jaw, hairline or apparent age.
Use a clear reference with visible eyes and a reasonable face size. Avoid starting with a tiny screenshot, a heavily filtered portrait or a face partly hidden behind a hand. Write a short list of features to preserve rather than describing a new attractive person.
Use the uploaded portrait as the identity reference. Preserve the person's facial proportions, apparent age, natural skin tone, eye shape, nose, hairline, hairstyle and distinctive marks. Keep the original expression and pose. Make only the requested edit; do not beautify, slim the face, enlarge the eyes or smooth away skin texture.
This is an untested reusable add-on, not a separate result in our comparison. Append it to a specific edit instead of submitting it without a change request.
Review at two scales. At normal size, ask whether the subject still looks familiar. Zoom in to check eyes, teeth, distinctive marks and hair boundaries. If the identity has drifted, return to the original reference rather than continuing from the altered face.
A repeatable workflow for better edits
- Keep the original. Save an untouched copy and use only images you have permission to process.
- Choose one task. Background first, then light, then styling if necessary.
- Write your keep list. Three to six important details are more useful than a long list of unrelated negatives.
- Generate one draft. In HighReach Image Variations, upload the reference, choose a model and review the displayed credit cost.
- Compare against the source. Inspect the edit region, identity, hands, small text and unchanged objects.
- Revise deliberately. Use the last accepted result for a local refinement, or return to the original when details drift. Where multiple inputs are supported, label the original and edited reference roles explicitly.
The Use this prompt buttons fill in the prompt only. You still need to upload your photo, select a model and approve generation. They do not spend credits or automatically upload any reference image.
Troubleshooting photo-editing prompts
| What went wrong | Likely ambiguity | Better next step |
|---|---|---|
| Everything changed | The request described a new scene, not a local edit | Name the edit region and foreground details to preserve |
| The face looks different | Pose, light and styling were changed together | Return to the original and make one change |
| A removed object left a shadow | The instruction named only the object | Include its shadow and specify the replacement surface |
| The shirt changed but the arms warped | Garment boundaries were unclear | Preserve wrists, hands and pose; use a selection if supported |
| Product lettering changed | The model regenerated the label | Supply a clear product reference and verify every character |
| A repeated edit loses texture | Each pass started from an imperfect previous output | Return to the source or an earlier accepted version |
Frequently asked questions
What is a good prompt for AI photo editing?
Name the uploaded image, the exact change, the details to preserve, and how the new element should match the scene. For example: "Replace only the wall with a soft gray backdrop. Keep the face, hair, clothes, pose and crop unchanged; preserve the original lighting."
Can the same prompt work with different models?
Yes, but expect different interpretations. Our three pairs show the same instructions applied to two Gemini-family models. Controls, output size and supported reference inputs vary by tool. Test a small edit before committing to a longer sequence.
How do I edit a photo without changing the face?
Use a clear source, limit the edit to a named region and preserve specific facial features. Review the result against the original. No prompt makes facial preservation infallible; important portraits may need conventional retouching instead.
Are Gemini photo editing prompts different from general editing prompts?
The basic method is shared. Model-specific instructions become useful when you manage multiple references, sequential edits or rendered text. Our Gemini and Nano Banana library covers those workflows rather than repeating this general method.
Are these prompts free to use?
The text is free to read and copy. Image generation may use credits or require a paid plan. Check your selected model's displayed cost before generating; this article does not promise free or unlimited outputs.
Choose your next edit
For original model-specific examples, continue to the Nano Banana prompt library. For a new photo concept rather than a local change, explore AI photoshoot prompts. If you already have a reference and an edit in mind, open Image Variations.